Where do I start?
After you have registered for the site, check your email for a temporary password to login for the first time. Once you’ve logged in, use your profile page to enter a new password and fill out your basic information; some of this will be used in your résumé. The résumé builder will automatically import your email address, but you can change it whenever you start your résumé(s).
Why can’t I download my résumé anymore?
Don’t worry, you still can. All your information and résumés have been saved in our database, so it’s still there and formatted for you. We have changed our service to allow you to submit your information directly online for our scholarship without any charge whatsoever. Submitting your activities for the scholarship is 100% free. In order to download a formatted résumé to use for other scholarships, college applications, and internships, there is a one-time charge of $14.99. Learn more about the transition here.
Dashboard Basics
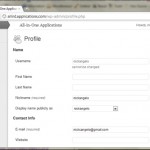 On the left side of your dashboard, you will see two categories –
1. Profile
2. Résumé Builder
Whenever you login, it will take you to this page. So just click on Résumé Builder to access the app.
Resume Builder Basics
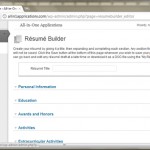 1. Title – this is where you name whichever resume you want to create. You may want to start with something like “college résumé” or “work résumé”.
2. Headers – just click on the headers to drop down that header and start filling in your info. It’s easy to add and remove sections, so if you start one and decide you don’t need it, just click Remove.
Activities, Extracurricular Activities, Community Service
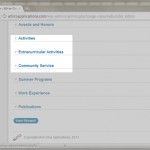 Okay…. here you have to decide which headers best showcase your activities. You may wind up filling out just Activities or you may choose Extracurricular Activities and Community Service. Just to let you know, if you don’t enter any info in a section, that category will not show up on your resume.
ACTIVITIES (Broadest Category) – If you think that you don’t have enough specific activities that you can categorize, choose this one. Here, you enter everything that you’ve accomplished. You don’t distinguish between school activities and community activities. You can use this one header to list out everything without separating your history into categories.
EXTRACURRICULAR ACTIVITIES (More Specific) – Here, you separate your school activities from your community activities. For example, if you played basketball, football, and were also on Student Council, list them here. Save your volunteer work for the Community Service header.
COMMUNITY SERVICE (Even More Specific) – After you’ve entered all your extracurricular activities, list your community service accomplishments. These may include Habitat for Humanity or any church service that you’ve done. Anything that can be considered going out of your way to help others should be included here.
NOTE: If you only have one or two community service accomplishments and a few activities, you may want to think about lumping everything together under Activities.
How do I Submit my Info for the Scholarship?
At the bottom of the page, you will find three buttons. Preview – shows you what a formatted résumé will look like, if you wish to purchase access to download the file. Save and Download – saves your progress to the My Résumés section where you can keep multiple résumés and download a fully formatted version of your activities. Apply for Scholarship – this button will send the information that is loaded on the page you are viewing and automatically file your information alongside with your online scholarship application that you can fill out here.
My Résumés
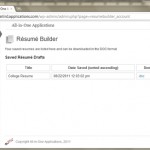 Here, you can access the résumés you’ve created. It keeps all the versions and the different titles you’ve made, so pick the newest one to pull up the most updated résumé. This is also where you can purchase access to download the résumé to open up in Word for you to tweak even more and to print out for review or submission.
My Résumé Looks Weird in Microsoft Word
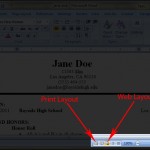 First thing you can try changing the View from “Web Layout” to “Print Layout” at the bottom right corner of the Word program. Or, select Print Preview to see what it will look like printed out. Any boxes around the header tables should not show up when you print the résumé, they’re just there as a guide.
